Friday, 23 June 2017

Curali nail stamping plates review


Hi guys! It's been a while, but today I'm back with a review of two nail stamping plates I bought from Curali.

I hit this website after I was watching a YouTube video from Swanette at Nailstamp4fun. She is always creating beautiful stamping nail art, and she seems to be a very sweet person through her videos.

I fell in love with the plates she showed, so I went ahead and bought two. The shipping was relatively reasonable, considering they were coming from Spain, and they arrived very quickly.

Here are some pictures of the two plates I bought:


As you might know, I love geometric pattern, and both of the plates deliver on that absolutely amazingly!


They are covered with a blue protective film and they have a sturdy plastic back.


The plate 014 is called Chevron, the plate 017 is called Op Art.

They are both well carved, and have very big images, they even cover my wide and long nails.

As a base I used Dark Metal Lacquer's "To Me You Are Perfect" from the 2015 December Paint The Rainbow Box.

The polish itself is a gorgeous light brown holographic, the perfect base for any pattern.

For the stamping I used Moyra stamping polish in Black. I also used liquid latex to protect my skin around the nail for easier clean up and my all time favorite clear stamper from Rainbow Connection

I choose random images from both plates for each of my nails, just to give it a proper try.

Here is my cindy hand:


And my swatch hand:


And finally the main picture after clean up and a nice layer of topcoat:


All in all I'm very very happy with my purchase, these plates are very good quality, they provide a big image for any nail shape and nail size and they are very easy to use. Even the images with smaller details picked up amazingly!

Highly recommend to check out the website for Curali Nails.


Thank you so much for stopping by, I hope you enjoyed my post, and see you soon! Xxx


Monday, 13 February 2017

"Faded Rose" from Sparklea Nail Polish - Swatches and review


Hi guys!

Today I have a very special polish on my blog for you!

When I saw a new collection from Leanne popping up on our Facebook group, I had to browse. She had awesome new colours all themed around Harry Potter, but I tried to be a good girl, and only ordered one.

The other surprise was, that I already knew her, as she visited me once to pick up a polish I destashed. At that time I haven't realised though, that she is behind this brand.

I asked her if I could pick up the polish I bought, maybe even combine it with a coffee and some girly chat. We set a date, and met in the local coffee shop. :)

I have to say, I enjoyed her company very much! Such a lovely, bubbly, giggly girl, full of creativity and inspiration.

The real shock came, when she handed my polish over, and told me, that she created a brand new one the night before, and she included a little sample of her prototype.

I sunk in the feeling of excitement and joy! The polish I actually bought is very very pretty too, but there will be another post coming up soon!

I couldn't wait to try this new polish, and you will be surprised! It's pink! (for fyi, I'm not a huge pink fan) But it's the most gorgeous shade of pink, with the perfect amount of holographic in it. My coffee went cold, actually I couldn't take my eyes off it! :)

I told her, I will make pictures of my swatches and will do a blog post, so I asked for the name of the polish.
She told me, she doesn't have a name for it, as it is so new, but any suggestions are welcome.
I'm considering myself not as creative when it comes to naming a polish, but without thinking the first thought just popped in my mind: "Faded Rose". She loved it, and I'm very happy, that she choose this name for her newest polish.

Enough blah, here is the star of the day:


Here is a picture of the polish with one coat:


I was actually surprised how well it was covering my nails at the first coat, considering it's a quiet light colour, but there is so much going on in it!

Here are more pictures:


I would describe this polish as a muted pink with a few drops of mauve,  a delicate shimmer and a hint of scattered holographic.
It's completely opaque in two coats, very easy to apply, wasn't to thin or thick, it applied itself like butter. I really enjoyed to work with this polish.
There were some minor brush strokes, but they go away whilst drying.

Love, love, love this polish! :) I hope it will be available soon, as in my opinion it will be a crowd pleaser!

If you feel you would like to try Leanne's polishes, here is the link to her website: Sparklea Nail Polish.

Last but not least I would like to say a huge thank you for Leanne, that she allowed me to try her new polish, and I can not tell you how honoured I feel, that I even could name it!

This experience will stay with my most beloved memories!


Thank you for stopping by, I hope you enjoyed this post! See you soon! Xxx


Sunday, 15 January 2017

Colors by Llarowe "Miss Grey" with black a bit of stamping


Hi guys!

Long time, no post, but the Christmas craziness is over, and it feels like my mojo is back, so here I have a little post for you.

Here is the end result of today's design, I hope you like it, and if you want to know how I did it, please keep reading!


Just a quick overview what I used for today's manicure:


The polish is Miss Grey from Colors by Llarowe. It's a stunning grey jelly polish with a ton of silver holographic shredded glitter. Also used MoYou's black stamping polish and my absolute favourite clear stamper from Rainbow Connection. I mention it in every stamping post, it's just awesome!
The plate is from BornPrettyStore, it's the number BP-L050 and although I bought it last fall, this will be the first time I will use it :)

Originally I chose another image from this plate, but when I had the polish on, changed my mind, and went for this image:


Let's get started! First I applied a base coat, I'm using Duri Rejuvacoat 2, which I have to admit is not my favourite base coat, I just try to use it up. I was surprised how yellow my nails look on the picture, in life, it's not that bad... I think...


The polish I choose for tonight is from Colors by Llarowe, called Miss Grey, and it's exclusive to Rainbow Connection.
At the first coat it is sheer and a little bit patchy, but those glitters are just so stunning!!!


With the second coat it started to build up very nicely. If you look very close, it's not completely opaque, but there is so many glitter in it, it's just very eye catching!


Can you tell I'm a bit obsessed with those shredded glitters??? :D

Next step was the stamping, and I thought this lightning bolt lookalike image would look good on this polish, so I went ahead, and stamped all my nails. Here is a pic before cleanup:


I quickly cleaned up, and used my one and only trusted top coat: Seche Vite:


I think the end result is bold but elegant, simple but unique. I couldn't have done it without the polish created by Leah Ann Llarowe! Love, love, love her polishes!

Here I have a "bit" more pictures, I just love my new camera as well as the polish I used!

Thank you so much for stopping by, and I hope to see you soon! Xxx


Layered sweet potato and onions baked with Camembert


Hi guys!

Today I have a rather different post here for you.

My other passion besides nail polish and nail art is cooking. In the past few months I came across several YouTube videos regarding "What I ate today", and I quiet enjoyed those.
I re-fell in love with cooking, and did find myself trying new dishes. I thought you might find it just as enjoyable as I did!

Now I'm the one, who never follows the recipes, I just love to create something new, most of the times from leftovers. So it's a win-win situation.

I saw a picture on Pinterest a while ago, and I thought, one day I will do that! 
The original dish was potato layered with sweet potato and onions, but as we don't eat potato, so I left it out.
I also had a lot of Camembert left from Christmas so that needed to be used. There came the idea to put the cheese on the top, and let it bake.

So I sliced two medium sized sweet potatoes and three onions, and just put them in a dish alternating between the two:


It already looked good! :)
I seasoned it with salt and coarse ground black pepper. Turned out the salt was not enough, but you never know how sweet the potato is! ;)


Now onto the star of the dish, the Camembert. My other half loves this type of cheese, so I bought a huge one for him for Christmas.
It seemed to big, and we still had a quarter left. I hate to throw food away, always try to create a dish to use all the ingredients in my fridge.
So the lovely present been sliced and placed neatly on the top of the potato-onion fan.


I also sprinkled the top with some smoked paprika just to give it a posh look, and a hint of flavour.
It went into the oven for 40 minutes on 170 Celsius.
The smell was awesome in the whole house! :)

The final result:


All the inside of the cheese been melted away, giving the sweet potato and onion a creamy bath. The crust remained on the top and became crispy.


Apparently it was delicious, and I have to agree, sometimes something unusual can become something delicious.

I definitely will recreate this dish in the near future, as it was cheap, very easy to do, and yummy!

I hope you enjoyed this blog post, although I know I only posted about nail polishes.

Please let me know in the comments if you would like to see more of these kind of posts!

Thank you so much for stopping by, and I hope to see you soon! Xxx


Thursday, 15 September 2016

"Monochrome" floral design using Bow Polish Solar top coat

Hi guys!


It's nearly time for me to go home, but I was desperate to try this new(ish) Solar topcoat from Bow Polish whilst on holiday.
I had a lot of ideas how to show the beauty of this polish in the best possible way, and I opted for a full coverage design.

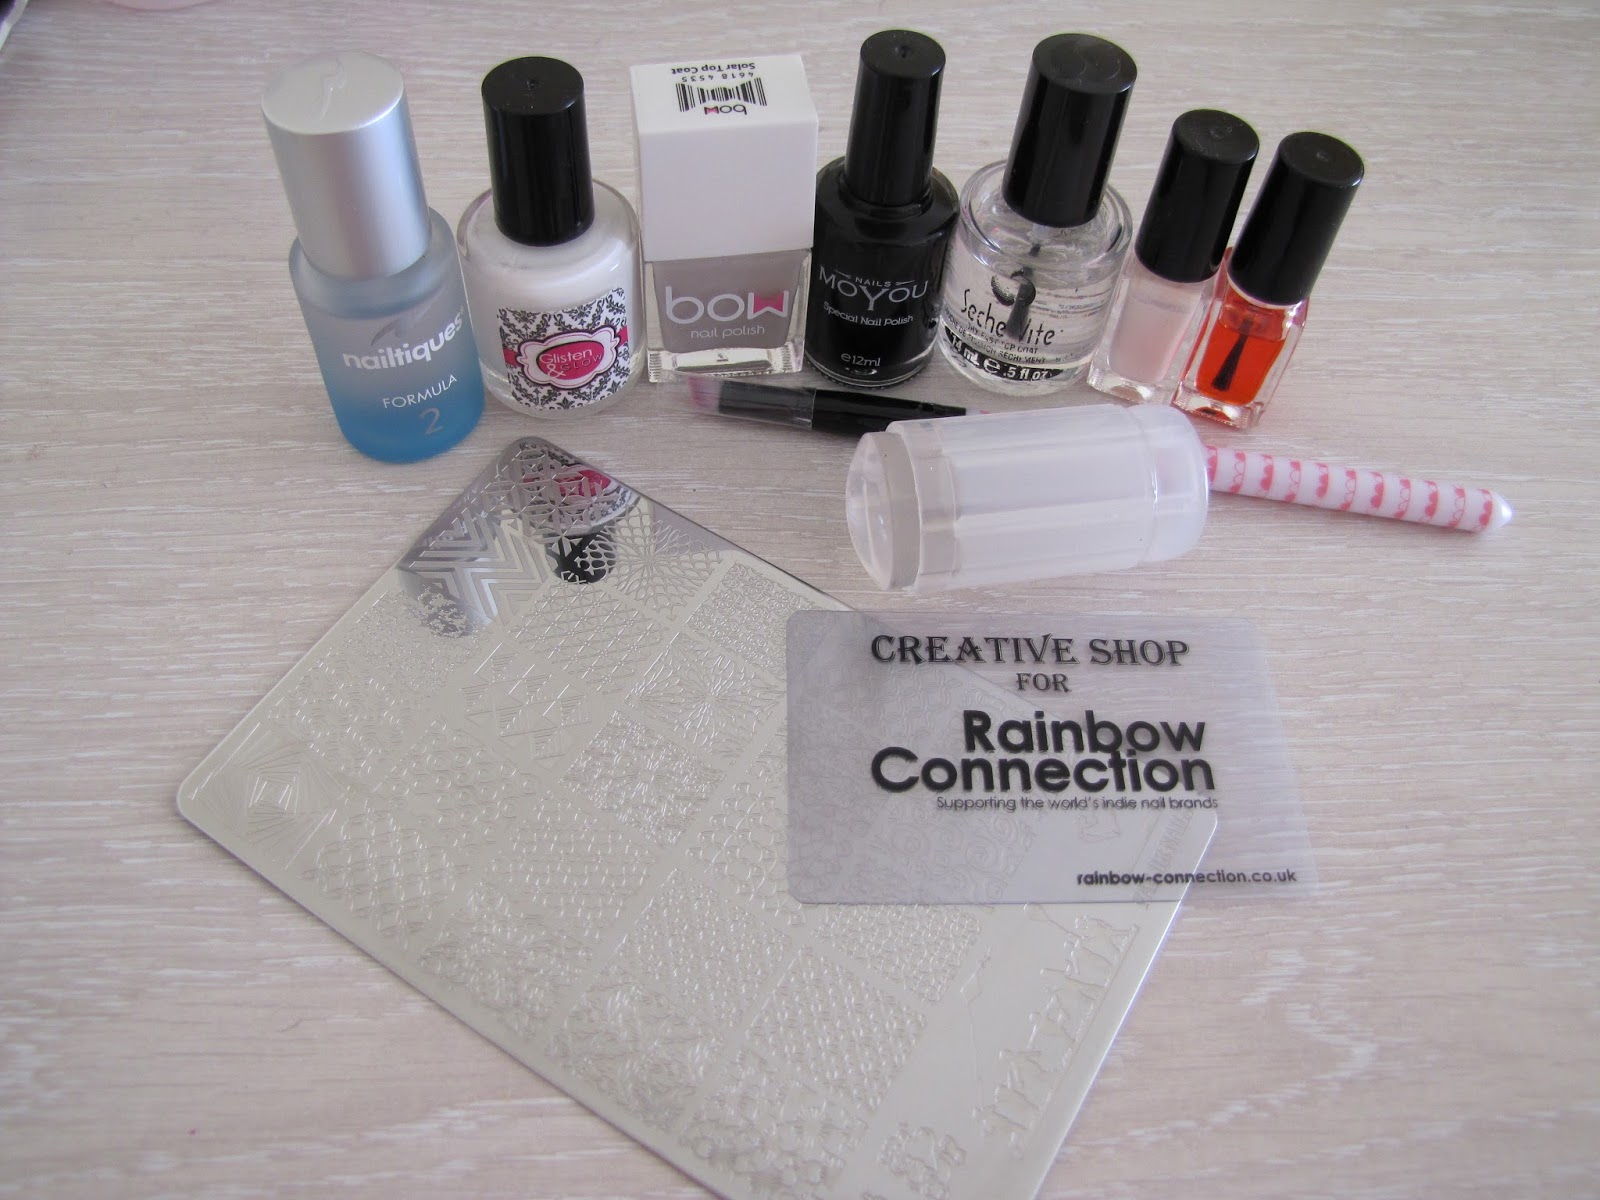
Here are the items I used for this manicure:


First I applied my base coat. I use Nailtiques Formula2, the only base coat which is actually helping with my peeling nails. (I can not believe how much my nails grove since last week...)


This time I applied only one coat of "Wedding Gown White" from Glisten & Glow:


Then I used two coats of Bow Polish's "Solar top coat", which is a milky semi sheer white crelly with a lot of silver micro glitter:


At this point it does not looks interesting, but keep reading, as this product got some amazing surprises! :)

I applied some liquid latex, and with a black stamping polish from MoYou, I stemped on the floral pattern. For the image I used FabUr Nails FUN16 plate and my clear stamper, both from Rainbow Connection:


At this point I started to really love this design! :)

After a clean up and a coat of high shine quick dry topcoat, I was finished, and actually very happy with the outcome!


The story of this design doesn't ends here, the magic just begins! :) The Solar top coat reacts with the UV in the Sunshine (also works with the UV light used for gel nails), so here are some indoor pictures:


And the beauty of this polish: on the Sun!!! :)


I love, love how the design is looking both in shadow, and on the Sun! The colour changing is a very interesting procedure, and in the shadow it transforms back quiet quickly.

Definitely unique, love the purple, and it's also a build in UV level tester, so you would know when to avoid the Sunshine (the purple gets darker).

I really enjoyed to create this design, and had a lot of compliments since!

If you like something special in your collection, this polish is a definite must have! Also, I would like to highlight, that Bow Polish changed the cap, the big square kind of silly cap is removable, leaving just a round, much more manageable cap to use.


Thank you so much for stopping by, I hope you enjoyed this tutorial/review, and see you soon! Xxx